Breaks, expenses, and notes
Beyond time tracking, tasks can include detailed information about breaks, project-related expenses, and contextual notes. These features help you maintain accurate records, track costs, and document important details for each work session.
Accessing breaks, expenses, and notes
During active timer
While the timer is running, tap the edit icon (pencil) next to the project name to access quick actions:
- New break: Add a pause period to the current session
- New expense: Log a project-related cost
- New note: Document important information
See the Timer documentation for more details about timer quick actions.
From task details
After a task is completed, access the Task Details screen and use the tabs:
- Breaks tab: View and manage all break periods
- Expenses tab: Track task-related costs
- Notes tab: Review and add documentation
Each tab displays existing entries and provides a button to add new ones.
Breaks
Track work interruptions like lunch, coffee breaks, or meetings to accurately measure productive working time versus total time.
Understanding break tracking
Breaks affect two important time calculations:
- Total: Complete duration from start to end (gray), includes break time
- rel. Duration (Relative Duration): Actual work time (green), excludes breaks
- Breaks: Total pause time (orange)
This distinction is crucial for:
- Accurate billing (charge clients only for work time)
- Payroll calculations (understanding productive hours)
- Personal productivity tracking
Managing breaks
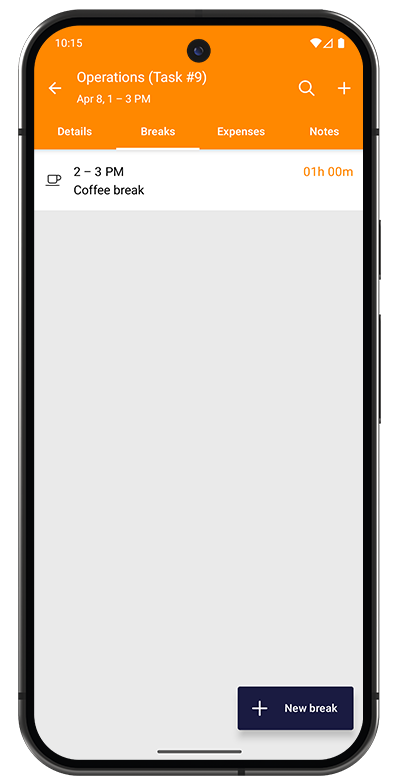
The Breaks tab in Task Details shows all break periods for the task:
- Time range of each break (e.g., "2 – 3 PM")
- Break description (e.g., "Coffee break")
- Duration in orange (e.g., "01h 00m")
Adding a Break: Tap the "+ New break" button to add a manual break.
Creating breaks
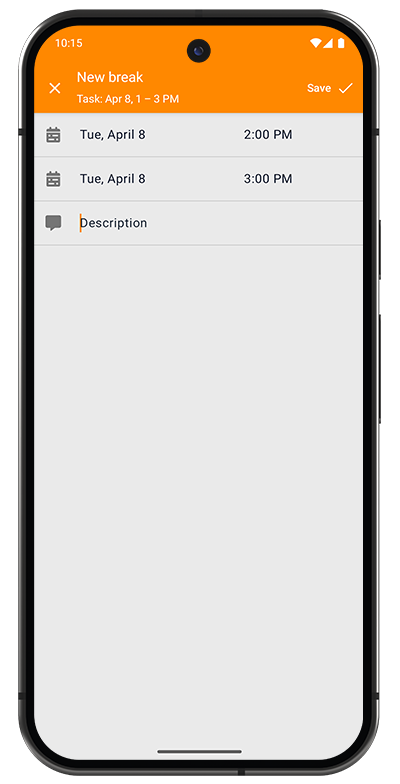
Break Entry Fields:
- Start date and time: When the break began
- End date and time: When the break ended
- Description (optional): Reason or type of break (e.g., "Lunch", "Client meeting", "Coffee break")
Methods for Creating Breaks:
- Automatic: Use PAUSE button on the timer during active work
- Manual: Add breaks after the fact from Task Details
- Quick Action: Use timer edit menu while running
Adding breaks ensures your billable hours reflect actual work time. This is especially important for hourly consulting, legal work, or any time-based billing.
Expenses
Track project-related costs that occur during work sessions, such as materials, travel, meals, parking, or accommodations. Expenses are attached to individual tasks and roll up to project totals.
Viewing expenses
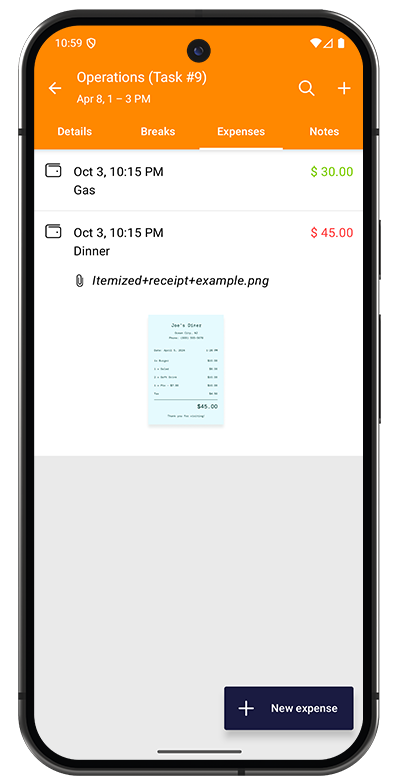
The Expenses tab in Task Details shows all costs for the task:
Each expense displays:
- Timestamp: When the expense occurred
- Description: What was purchased (e.g., "Gas", "Dinner")
- Amount: Cost in your currency
- Green ($30.00) = Paid/reimbursed
- Red ($45.00) = Unpaid/pending
- Receipt attachment: Thumbnail preview if attached (e.g., "itemized+receipt+example.png")
- Tap to view full-size receipt image
Adding an Expense: Tap the "+ New expense" button to log a new cost.
Creating expenses
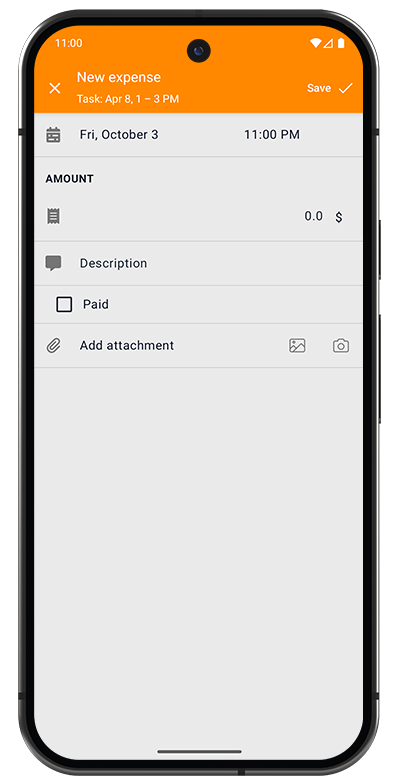
Expense Entry Fields:
- Date and time: When the expense occurred (defaults to current time)
- AMOUNT: Cost value with currency symbol
- Description: What was purchased or the purpose
- Paid checkbox: Mark if this has been reimbursed or paid
- Add attachment: Attach receipt image or PDF
- Gallery icon: Choose from photo library
- Camera icon: Take a photo of the receipt now
Expense summaries
Expenses aggregate up to show totals in:
- Task Details: Expenses for this specific task
- Project Details: All expenses across all tasks (Total, Paid, Unpaid)
Notes
Add contextual information, documentation, and reference materials to tasks. Notes help you remember important details, track decisions, and maintain comprehensive records for each work session.
Viewing notes
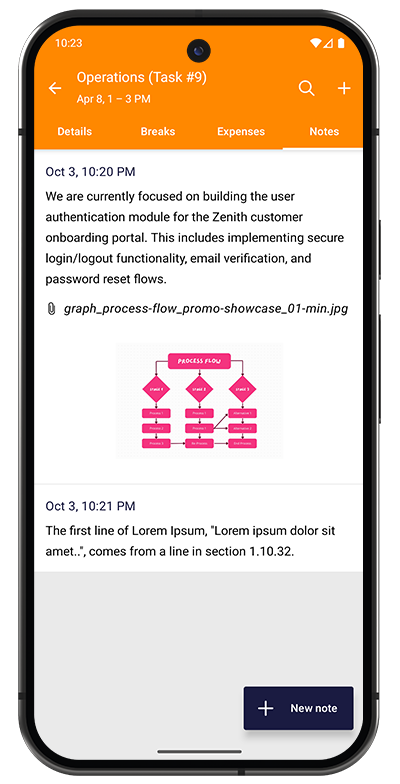
The Notes tab in Task Details shows all notes for the task:
Each note displays:
- Timestamp: When the note was created
- Description text: Full note content
- Attached files: Image or document thumbnails
- Tap to view full-size attachments
Notes are displayed chronologically, making it easy to follow the progression of work or decisions over time.
Adding a Note: Tap the "+ New note" button to create a new entry.
Creating notes
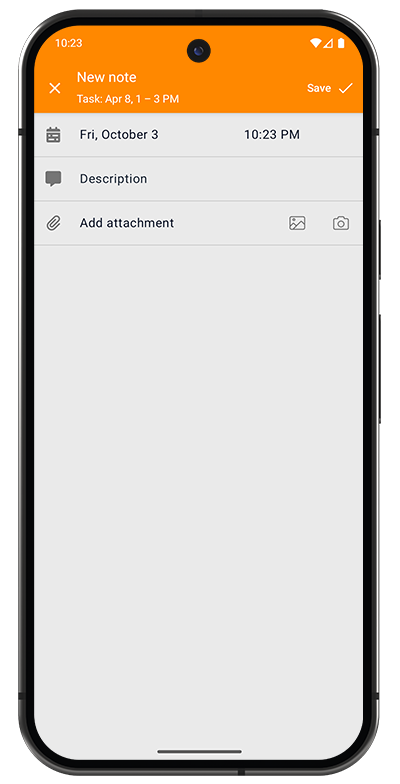
Note Entry Fields:
- Date and time: When the note was created (defaults to current time)
- Description: Note content, observations, or documentation
- Add attachment: Attach supporting files
- Gallery icon: Choose images or documents from your library
- Camera icon: Take a photo to attach
Common uses
- Document work accomplished or decisions made
- Attach screenshots, diagrams, or reference materials
- Track action items and follow-ups
- Record client feedback or scope changes