Projects
A project organizes your work. It holds details like the client, a color, an hourly rate, and the team it belongs to. Projects can have members with their own permissions, and they contain the tasks you track.
The projects list
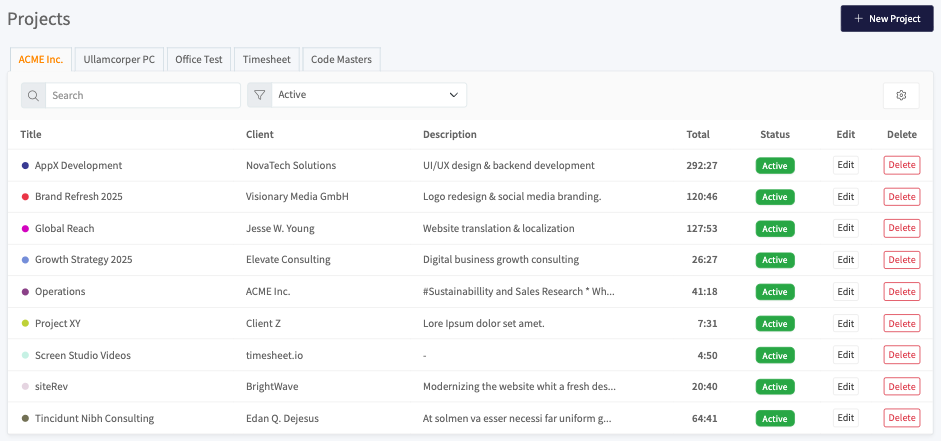
What you see: A tab for each team at the top, then a table of projects with these columns:
- Title: The project name, with its color shown as a dot.
- Client: The client or employer linked to the project.
- Description: A short summary of the project.
- Total: The total time tracked on the project.
- Status: Whether the project is Active or archived.
- Edit and Delete: Quick actions for each row.
How to use it:
- Switch teams using the tabs.
- Use Search to find a project by title, client, or description.
- Use the status filter (set to Active by default) to switch between active and archived projects.
- Click New Project in the top right to create a project.
Deleting a project permanently removes all of its tasks and ToDos. This cannot be undone.
Project details
Open a project to see its details and summary.
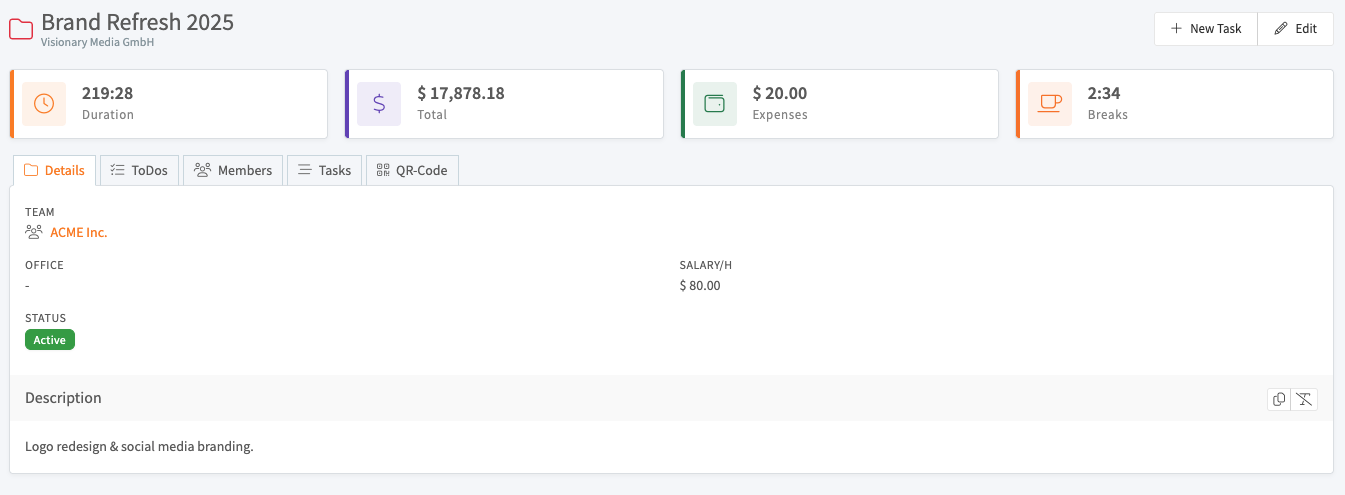
The header shows the project title and client, plus New Task and Edit buttons. Below it, four cards summarize the project:
- Duration: Total time tracked.
- Total: Total earnings, based on the hourly rate.
- Expenses: Total expenses recorded on tasks.
- Breaks: Total break time.
The details view is split into tabs:
| Tab | What it shows |
|---|---|
| Details | Team, office, status, hourly rate, and description |
| ToDos | A checklist of items for the project |
| Members | The people assigned to the project |
| Tasks | All time entries on the project |
| QR-Code | A code for starting and stopping the timer from a mobile device |
Creating or editing a project
Click New Project in the projects list, or Edit on a project, to open the form.
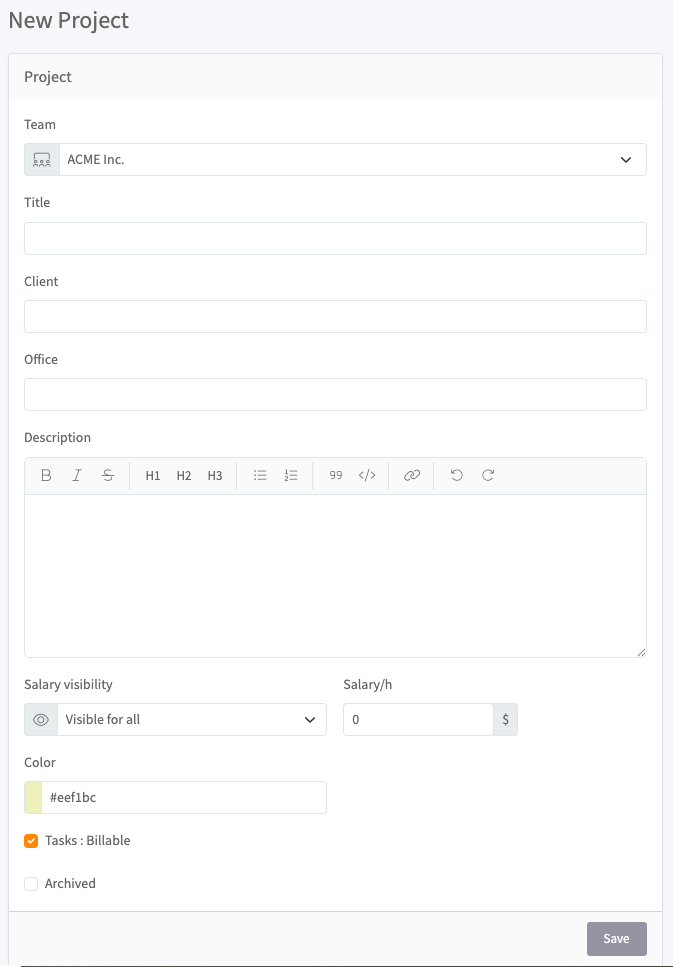
Fill in the fields you need:
- Team: The team the project belongs to. This is set when you create the project.
- Title: The project name. This is required.
- Client: The client or employer for the project.
- Office: A location for the project.
- Description: A formatted description, using the rich text toolbar for headings, lists, and links.
- Salary visibility: Who can see the hourly rate. Set it to Visible for all or restrict it.
- Salary/h: The hourly rate, with its currency. This drives the earnings shown on the project.
- Color: A color to identify the project. Enter a hex value or pick one.
- Tasks : Billable: When checked, new tasks on this project are marked billable by default.
- Archived: Check this to archive the project and hide it from timers.
Click Save to store your changes.
How earnings are calculated
The Total on a project is the time tracked multiplied by the Salary/h rate. Set a rate to track earnings, monitor profitability, and prepare client invoices.
Active and archived projects
- Active projects are available for time tracking.
- Archived projects are kept with all their data but hidden from timers. Archive a project instead of deleting it when you want to keep its history.
Members
Open the Members tab on a project to see who is assigned to it, and add people from there.
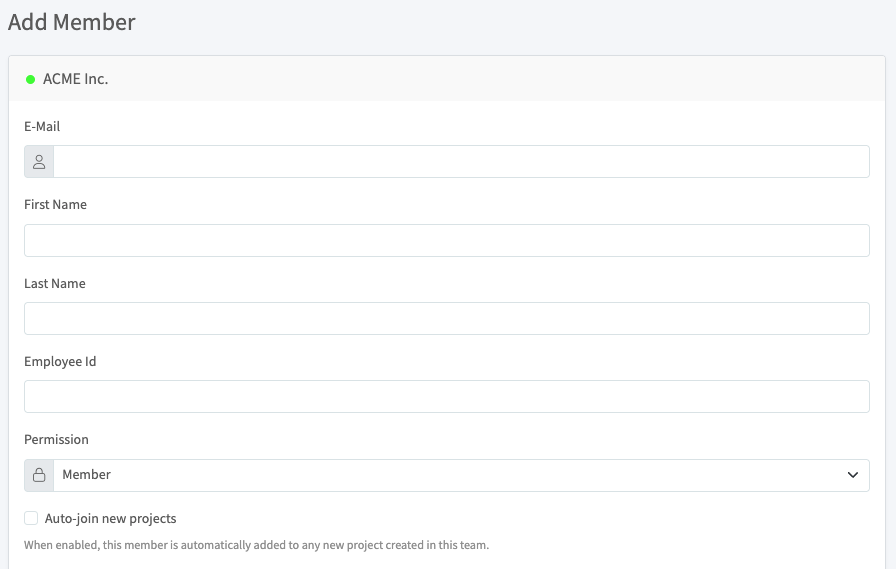
When you add a member, fill in:
- E-Mail: The email address of the person.
- First Name and Last Name: The member's name.
- Employee Id: An optional identifier for the member.
- Permission: The member's role, for example Member. This controls what they can do on the project.
- Auto-join new projects: When enabled, this member is automatically added to any new project created in this team.
Tasks
The Tasks tab lists every time entry on the project.
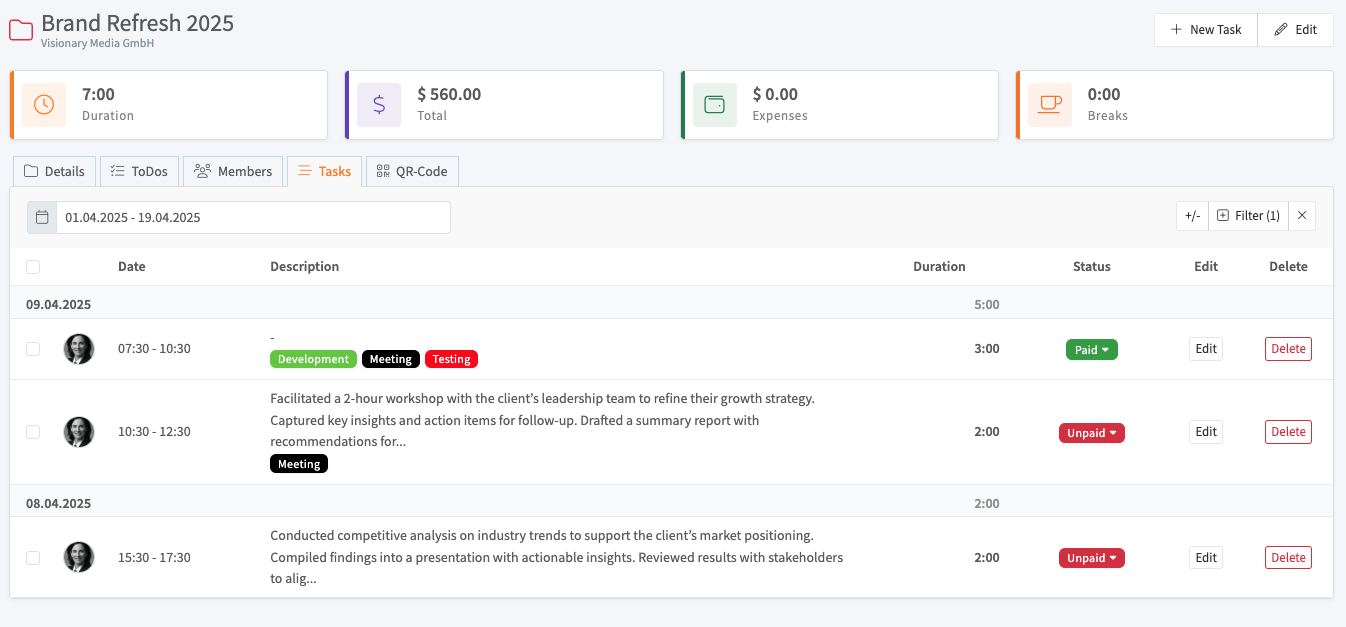
What you see: Entries grouped by date, each showing the person who tracked it, the time range, the description, any tags, and the duration. The columns are:
- Date: The day and time range of the entry.
- Description: What was worked on, with tags such as Development or Meeting.
- Duration: How long the entry lasted.
- Status: The billing status, Paid or Unpaid. Change it from the dropdown.
- Edit and Delete: Quick actions for each entry.
How to use it:
- Set a date range at the top to limit which entries are shown.
- Use Filter to narrow the list further.
- Use +/- to expand or collapse the grouped entries.